zondag 19 mei 2013

A new buildpackage

Buildpackage V0.02 is up. 

 You can find the new buildpackage here

There are several things noteworthy about this update.

Firmware
A version of the firmware that runs on ramps has been added. This firmware (Beta 0.01) is still very buggy, but runs nicely on ramps and has yielded me some prints.

Technical drawings
I have taken the time to make technical drawings with exploded views and BOM's. I won't be making any step by step building instructions, but I hope this will compensate that.
One of the technical drawings


STL parts
I have updated the stl parts to include the new depositer, which is easier to build and actually works. Also the pistons are now driven by NEMA17 motors.
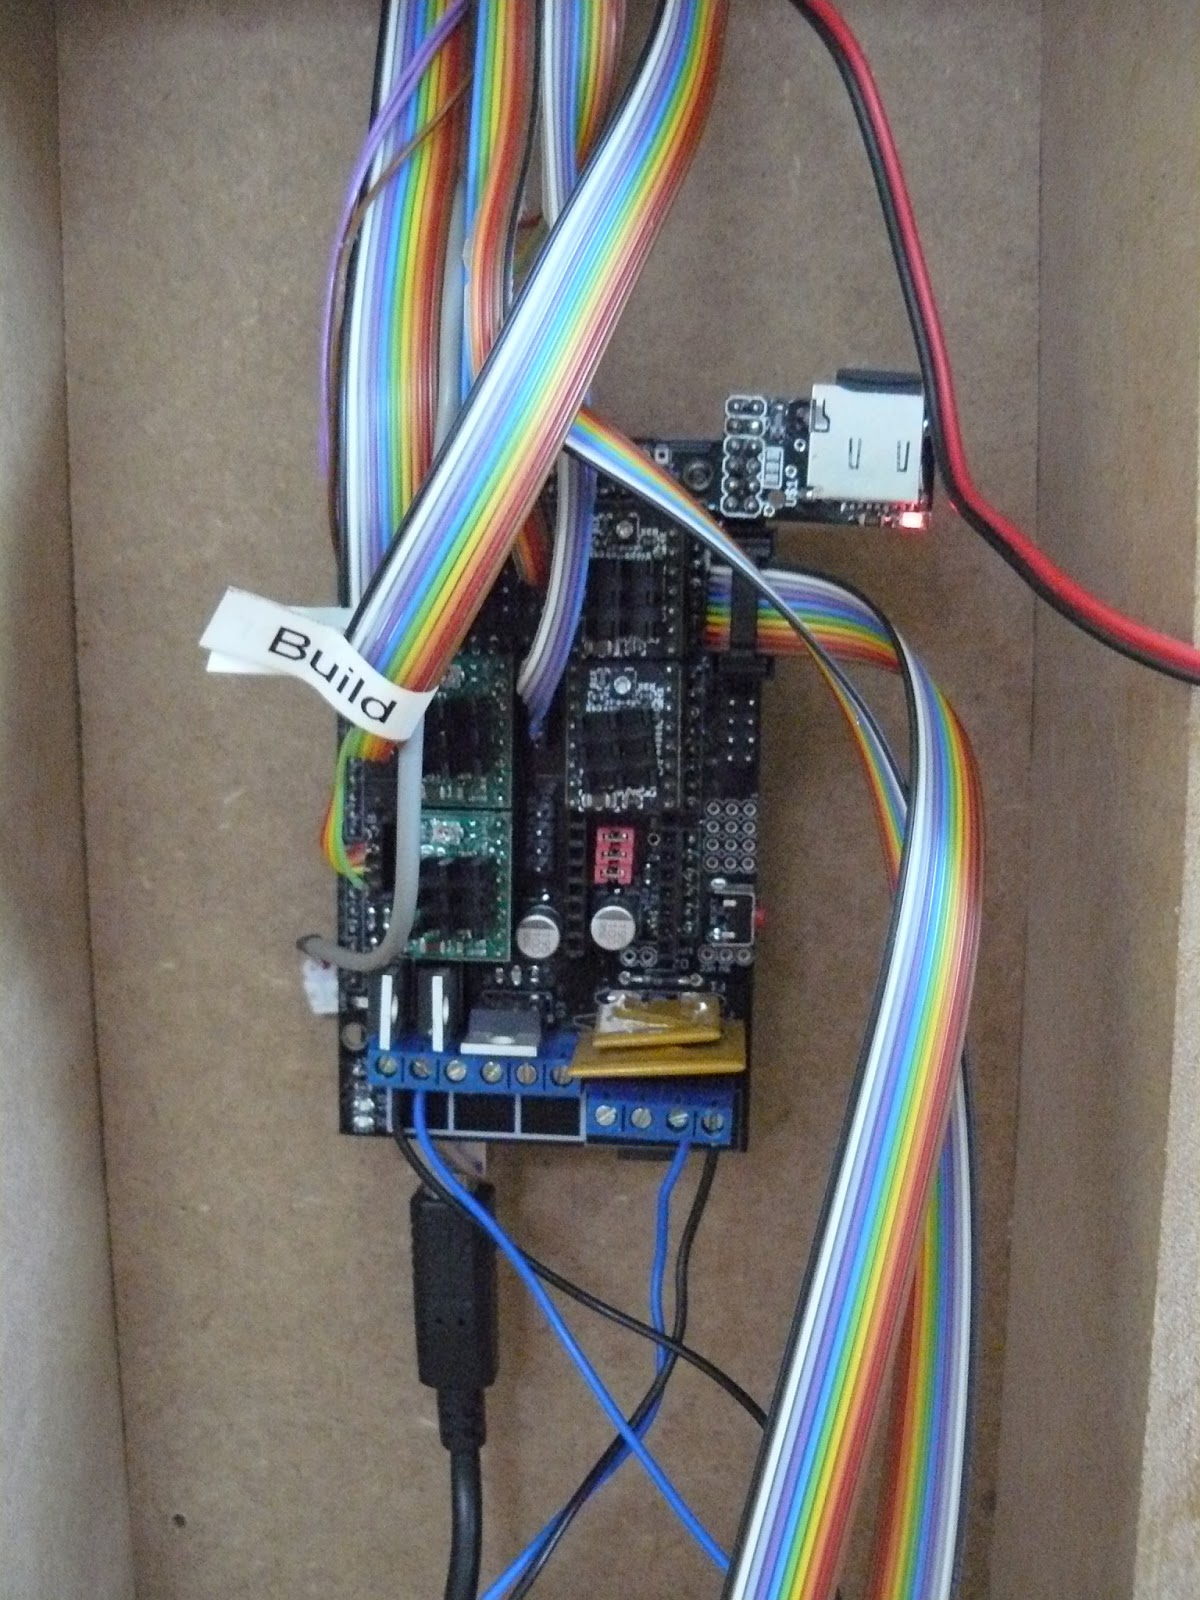
Electronics
I have included a schematic of the Ramps and a schematic of the laser driver in the buildpackage. I have also added a pdf of the pcb, but this one is untested. I have built both my laser drivers on experimental pcb's. I do have the tools to make a pcb, but I like soldering the board myself if I only need small quantities. 

In the Buildpackage.pdf you can find lists of needed parts, specifications and instructions. It is not yet fully finished, but it is the most recent version with the most information available.
 

Forgotten parts
Time for a little confession, I forgot a not unimportant (I refuse to say important) part. The part that links the piston motors with the M4 lead screw. I will include this in the new buildpackage, but until then it is not in the build package.

The problem with the link is that it is made with a lathe. Since you probably don't have a lathe available, you wouldn't be able to make it anyway. I am going to work on a printable version.

Now the sad part
I am busy with school. I myself will not work on this for at least a month. In Juli, I will resume work on focus. I have two things planned, A 9W fiber laser and a inkjet nozzle. How much of this I am going to do is still unknown, but you will see in good time.

Dragonator out

zondag 5 mei 2013

First real steps

After a long break, some disappointing results and some rethinking, I finally managed to get myself to documenting some of the progress.

October 2012 I decided to answer the question: "how hard can it be to build an SLS printer?". I can already tell you that the answer is: Very hard. 

Nonetheless, I am continuing to make small and large steps toward a working 3D powder printer. 

What is Focus
Focus is a DIY, open source powder printer. It is currently fitted with a laser for SLS, but it can easily be adapted for 3DP binder printing. It costs around €600 to build as is. This is with 1,5W 808nm laser, driver, all electronics and parts.

I know that real SLS requires Nitrogen chambers, Heated buildboxes and preferably CO2 lasers. Also a disclaimer in advance. I have never actually sintered any material. All I have so far is melting. Still useful, just not sintering.

To make one yourself, go to this page:
http://www.thingiverse.com/thing:33697

Here you will find a complete build package. Before starting, make sure that you have the most recent version. There is an update coming up (V0.02) in the next week or so.

Focus in it's full glory
Features
Focus is currently fitted with one 808nm 1,5W laser diode. In the future I plan to add a second one, to speed things up, but for now, this will do. Focus is built around 15mm MDF and 3D printed parts. There are 5 NEMA17 motors controlling the X (2 motors), Y, B and F axis.

Electronics
Out with the old, in with the new. When this project started, there were just too many differences to the printer to use ramps. Now it is fully ramps controlled. All motors, endstops and other systems directly hook up to ramps. Only the laser driver, which hooks up to the nozzle heater, is custom and I promise that I will upload the schematics of it.

The ramps has an SD card reader, a keypad and a 4x20 LCD screen to interface with the outside world. At no time is focus connected to a computer. The Gcode is stored on a micro SD card in the form of "print.txt".

The old, custom electronics

The new, shiny, autonomous ramps
The laser driver, analog FTW


layer depositing systems
I had to completely redo the layer distribution. At first, I had a roller. Powering the roller was a challenge and it was hard to build without a lathe. The new system can be 3d printed and uses an aluminum angle profile to deposit the new layer. 


Materials
SLS can print in a lot of materials. Most material however are very hard to print with the (relatively) small laser that I am using. Another problem with my printer is that the laser has a hard time getting 'grip' on the material. Most powders are simply too white and reflect too much light. I have solved this by adding a minute carbon impurity into the printing material. <1% of carbon is more than enough to make the laser heat up the material.

So far I have tried 3 materials, with various degrees of success. 

Candelillawax was first tried because of this guy (http://andreasbastian.com/3dp/3dp.html). He has successfully printed in this wax and even tough he has enormous amounts of shrink, it still is the best result anyone has ever achieved. I have not managed to get the same results yet. I have printed some small lines, but only by sinking 3+ millimeters into the buildbox to get enough material in the line. 
A test square printed in Candelillawax


E-PVC was tried next, not because I thought that it would be a good idea, but simply because it was available. Like most PVC's, this stuff burns simply by looking at it. It is pvc, it has no thermal properties and the only thing the laser does to it is burn it.
A print in E-PVC. It has no structure and is only burned


Nylon 2201 powder was the last attempt, and the first real result in months. I got this stuff from a company that prints models in SLS (not shapeways, they wouldn't sell me any). The printed line is nice and small, continuous, and even a single line has some strength. I am currently working full speed to get real prints out of the stuff. Only there is a huge amount of shrink, due to several problems such as fully melting the material and no heated buildbox.

Nylon2201 (left) and ground carbon (right)

A Nylon testprint. It is dark because of the carbon
Future plans 
Other than getting nylon to work, there are several things that I am planning to do to get more results.

A heated buildbox should increase all of the positive thing. What I am hoping for is higher build speed and far FAR less shrink. Taking out the build- and feedbox assembly is a lot easier than it looks, There are basically only four screws holding that thing in place. Then it is just a matter of replacing the wooden assembly for an aluminum one that can be heated.

For 3DP printing  there are two options. I can use a inkjet printing nozzle, that will require me to completely redo all of the firmware and force me find or make software to slice the model. Or I build a single nozzle printhead that can be controlled with the same firmware that controls my current printer. Not a hard guess isn't it? A 3DP printer can print in a lot more materials for hobbyists, but requires more steps after printing, like impregnating the model with glue or firing it. 

For 3DP printing ceramics, I found this link: 
http://ceramicartsdaily.org/ceramic-supplies/pottery-clay/the-printed-pot/
I am planning to print in ceramic powder with binder. It seems like fun, I only need a place where I can fire the prints.

Untill the next update, 

Dragonator out